🚀 Supercharge your YouTube channel's growth with AI.
Try YTGrowAI FreeFlask User Authentication – How to Setup User Login in Flask?

In this article, we will code Flask user authentication using the Flask-Login Library and SQLAlchemy. So let’s get started!
Nowadays, almost all the websites have user authentication systems coded into them. We can set-up an account with user authentication either directly or via a third-party like Google, Facebook. Apple etc.
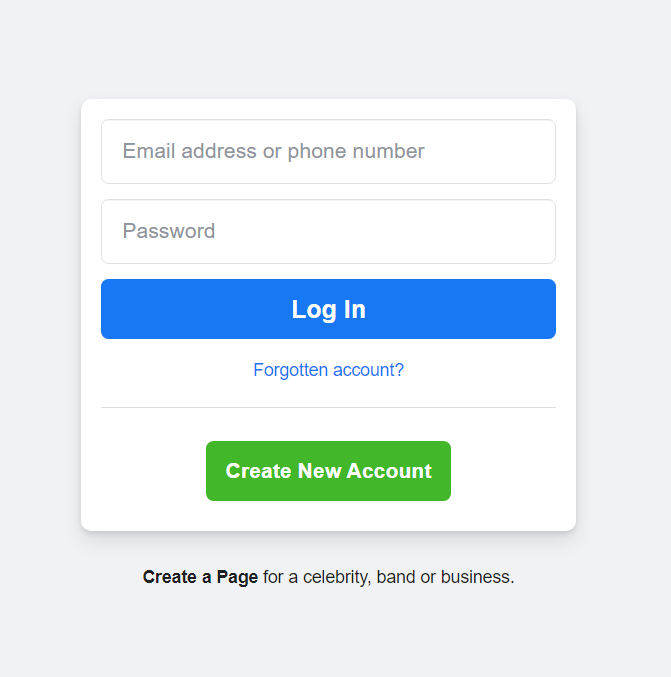
A typical user login page looks like this:
User authentication is an essential part of the webpage since it protects user data such that only that particular user can access it. There are different ways to authenticate a user:
- Cookie-based authentication
- token-based authentication
- OAuth authentication
- OpenId
- Saml
We will now code using Flask-Login authentication. So let’s dive into the coding part.
Hands-On with Flask User Authentication
Flask-login uses Cookie-based Authentication. When the client logins via his credentials, Flask creates a session containing the user ID and then sends the session ID to the user via a cookie, using which he can log in and out as and when required.
First we need to install the Flask-Login
pip install flask-login
Now that it’s installed, let’s move into the coding part!
1. Coding the models.py file
First, we will create the User Model to store user credentials. We will use Flask_SQLAlchemy and SQLite Database to do this.
One Important thing to note here is that we cannot save the user passwords directly on the database because if some hacker gets access to our site, he will be able to retrieve all the information from the database.
So we cannot afford that. But don’t worry, Flask werkzeug has inbuilt functions to deal with this problem.
1.1 Setup a Password Hash
The solution is to use a Password Hash. Let us see what a hash is, so go to the python shell in the terminal and run the command
from werkzeug.security import generate_password_hash
a = generate_password_hash('1234')
print(a)
We will get a long random string as shown below:

Hence even if the hacker gets access to them, he won’t be able to decrypt. Also, we have another function to compare the Hash with a password, called check_password_hash.
It works as below:
from werkzeug.security import generate_password_hash, check_password_hash
a = generate_password_hash('1234')
print(a)

chech_password_hash(a,'1234')
Now hit enter, it will return True if matched and False if unmatched.

1.2 Adding Hashed Passwords to Your Database
Also if you don’t have FlaskSQLAlchemy, simply install it using the pip command:
pip install flask-sqlalchemy
Okay, now that SQLAlchemy is in place, create a file models.py and add the code:
from flask_sqlalchemy import SQLAlchemy
from werkzeug.security import generate_password_hash, check_password_hash
from flask_login import UserMixin

db = SQLAlchemy()

class UserModel(UserMixin, db.Model):
    __tablename__ = 'users'

    id = db.Column(db.Integer, primary_key=True)
    email = db.Column(db.String(80), unique=True)
    username = db.Column(db.String(100))
    password_hash = db.Column(db.String())

    def set_password(self,password):
        self.password_hash = generate_password_hash(password)

    def check_password(self,password):
        return check_password_hash(self.password_hash,password)
Here:
- We are storing the email, username, and password hash
- Also, we will define 2 class methods – set_password to generate the password hash and check_password to compare them
We also use a UserMixin from the flask_login library. UserMixin has some inbuilt functions which we will use later:
- is_authenticated: Return True if the user has Valid credentials
- is_active: Returns True if the user’s account is active. Eg- All disabled accounts on Instagram will return False.
- is_anonymous: Returns False for regular users and True for first-timers/anonymous users
- get_id(): Returns a unique identifier for a user as a string.
1.3. Setting the Flask_login Extension
Also, we need to create and initialize the Flask_login extension. We do it using the code:
from flask_login import LoginManager

#...
login = LoginManager()
#...
As we discussed earlier, Flask stores the User ID of the logged-in users in the session. Since Flask_Login knows nothing about databases, we need to create a function to link both of them.
This is done using user_loader function. The syntax is:
from flask_login import LoginManager
login = LoginManager()

@login.user_loader
def load_user(id):
    return UserModel.query.get(int(id))
1.4. Complete Code
That’s it with the models.py part. Let us just look at the whole code once:
from flask_sqlalchemy import SQLAlchemy
from flask_login import UserMixin
from werkzeug.security import generate_password_hash, check_password_hash
from flask_login import LoginManager

login = LoginManager()
db = SQLAlchemy()

class UserModel(UserMixin, db.Model):
    __tablename__ = 'users'

    id = db.Column(db.Integer, primary_key=True)
    email = db.Column(db.String(80), unique=True)
    username = db.Column(db.String(100))
    password_hash = db.Column(db.String())

    def set_password(self,password):
        self.password_hash = generate_password_hash(password)

    def check_password(self,password):
        return check_password_hash(self.password_hash,password)


@login.user_loader
def load_user(id):
    return UserModel.query.get(int(id))
Do check out our SQLAlchemy Article if you are unfamiliar with Flask SQLAlchemy.
2. Coding our main Flask application file
Now let’s code our main Flask Application File.
from flask import Flask

app =Flask(__name__)

app.run(host='localhost', port=5000)
2.1 Linking Database to our Flask File
Okay now we need to link our SQLite database with SQLALchemy. So for that add the code:
from flask import Flask

app =Flask(__name__)
app.config['SQLALCHEMY_DATABASE_URI'] = 'sqlite:///<db_name>.db'
app.config['SQLALCHEMY_TRACK_MODIFICATIONS'] = False

app.run(host='localhost', port=5000)
Just replace <db_name> with whatever name you want. Also, we need to link our SQLAlchemy DB instance (present in models.py file) with the main app. For that, add:
from flask import Flask
from models import db

app =Flask(__name__)
app.config['SQLALCHEMY_DATABASE_URI'] = 'sqlite:///<db_name>.db'
app.config['SQLALCHEMY_TRACK_MODIFICATIONS'] = False

db.init_app(app)
app.run(host='localhost', port=5000)
Now we must add the code to create the database file before the first user request itself. We do that as follows:
from flask import Flask
from models import db

app =Flask(__name__)
app.config['SQLALCHEMY_DATABASE_URI'] = 'sqlite:///<db_name>.db'
app.config['SQLALCHEMY_TRACK_MODIFICATIONS'] = False

db.init_app(app)
@app.before_first_request
def create_table():
    db.create_all()

app.run(host='localhost', port=5000)
Now everything with the DB part is over. Let’s now move on to the Flask_login Part
2.2 Adding User Authentication to our app
Similar to the DB instance, we must link the login instance to our app as well. We do it using:
from flask import Flask
from models import login

app =Flask(__name__)

login.init_app(app)

app.run(host='localhost', port=5000)
After that, we tell Flask_login about the page; the unauthenticated users will get redirected, which will be nothing but the login page itself.
Hence add the code:
from flask import Flask
from models import login

app =Flask(__name__)

login.init_app(app)
login.login_view = 'login'

app.run(host='localhost', port=5000)
After the redirect page is mentioned, we can simply add the @login_required decorator to all the webpage views that will need authentication.
Cool! Now the only thing that is left is the login, register, and logout views. But before that, let us code a simple page that the users can see after authentication
2.3 Coding a Simple View
Hence add a simple view:
from flask import Flask, render_template
from flask_login import login_required

@app.route('/blogs')
@login_required
def blog():
    return render_template('blog.html')
Note how we have used the @login_required decorator. The blog.html template would be:
<h2>Welcome to the Blog</h2>

<h3>Hi {{ current_user.username }}</h3>

<a href="{{ url_for('logout')}}">Logout Here</a>
Do checkout our Flask Templates article to know more about Templates.
2.3 Coding the Log-in View
The Login view would be simple. It should do the following:
- If the user already authenticated, redirect to the blogs page or else display an HTML Form
- Retrieve the user information from the DB
- Compare the credentials, if correct, redirect to the blogs page
So add the code:
from flask import Flask, request, render_template
from flask_login import current_user, login_user

@app.route('/login', methods = ['POST', 'GET'])
def login():
    if current_user.is_authenticated:
        return redirect('/blogs')

    if request.method == 'POST':
        email = request.form['email']
        user = UserModel.query.filter_by(email = email).first()
        if user is not None and user.check_password(request.form['password']):
            login_user(user)
            return redirect('/blogs')

    return render_template('login.html')
And the login.html template:
<form action="" method = "POST">
    <p>email <input type = "email" name = "email" /></p>
    <p>password <input type = "password" name = "password" /></p>
    <p> submit <input type = "submit" value = "Submit" /></p>
</form>

<h3>Dont Have an account??</h3>
<h3><a href = "{{url_for('register') }}">Register Here</a></h3>
2.4 Coding the Register View
The Register View should be able to do the following:
- if the user already authenticated, redirect to the blogs page or else display an HTML Form
- Add the user data to the DB
- Redirect to the login page
So the code will be:
from flask import Flask, request, render_template
from flask_login import current_user

@app.route('/register', methods=['POST', 'GET'])
def register():
    if current_user.is_authenticated:
        return redirect('/blogs')

    if request.method == 'POST':
        email = request.form['email']
        username = request.form['username']
        password = request.form['password']

        if UserModel.query.filter_by(email=email):
            return ('Email already Present')

        user = UserModel(email=email, username=username)
        user.set_password(password)
        db.session.add(user)
        db.session.commit()
        return redirect('/login')
    return render_template('register.html')
Therefore the register.html page will be:
<form action="" method = "POST">
    <p>email <input type = "email" name = "email" /></p>
    <p>Username <input type = "text" name = "username" /></p>
    <p>password <input type = "password" name = "password" /></p>
    <p> submit <input type = "submit" value = "Submit" /></p>
</form>

<h3>Already Have an Account?</h3><br>
<h3><a href ="{{url_for('login')}}">Login Here</a></h3>
2.5 Coding the Logout View
The Logout View should simply log users out. Therefore add the code:
from flask import Flask, render_template
from Flask_login import logout_user

@app.route('/logout')
def logout():
    logout_user()
    return redirect('/blogs')
That’s it !! Therefore let us once look at the full code for this section:
from flask import Flask,render_template,request,redirect
from flask_login import login_required, current_user, login_user, logout_user
from models import UserModel,db,login

app = Flask(__name__)
app.secret_key = 'xyz'

app.config['SQLALCHEMY_DATABASE_URI'] = 'sqlite:///data.db'
app.config['SQLALCHEMY_TRACK_MODIFICATIONS'] = False


db.init_app(app)
login.init_app(app)
login.login_view = 'login'

@app.before_first_request
def create_all():
    db.create_all()

@app.route('/blogs')
@login_required
def blog():
    return render_template('blog.html')


@app.route('/login', methods = ['POST', 'GET'])
def login():
    if current_user.is_authenticated:
        return redirect('/blogs')

    if request.method == 'POST':
        email = request.form['email']
        user = UserModel.query.filter_by(email = email).first()
        if user is not None and user.check_password(request.form['password']):
            login_user(user)
            return redirect('/blogs')

    return render_template('login.html')

@app.route('/register', methods=['POST', 'GET'])
def register():
    if current_user.is_authenticated:
        return redirect('/blogs')

    if request.method == 'POST':
        email = request.form['email']
        username = request.form['username']
        password = request.form['password']

        if UserModel.query.filter_by(email=email).first():
            return ('Email already Present')

        user = UserModel(email=email, username=username)
        user.set_password(password)
        db.session.add(user)
        db.session.commit()
        return redirect('/login')
    return render_template('register.html')


@app.route('/logout')
def logout():
    logout_user()
    return redirect('/blogs')
The UserModel.query.filter_by(email=email).first() will return the firt User it gets from the Database or will return None if no user was found.
Implementation of the Flask User Authentication Application
Let us finally test our app. Run the Flask file:
python filename.py
And try to go to “/blogs“. You will get redirected to the login page.

Click on register and then add your details.

Hit submit, you will reach back the login page. This time enter you credentials and log in. You will see the Blogs page !!

Note: Using simple emails like [email protected] might give you a error like the one shown below in the Chrome Browser.

As you can see, we have been redirected to the “blogs” endpoint here. There’s a security message that popped up in my screenshot above since I’ve used a random non-existent with a very weak password.
You can try the same with a stronger password and a good email address and you’ll directly see the blogs page instead of the security warning as it is in this case.
Conclusion
That’s it, guys! This was all about User Authentication in Flask. Do check out our Flask sessions and cookies article to know more about how they work.
In the next article we will deploy our application onto a Cloud server.


