🚀 Supercharge your YouTube channel's growth with AI.
Try YTGrowAI FreeDjango Admin Template – Modify the Django Admin Interface

In this article, we will learn about the admin site interface and how we can modify it using Django admin template.
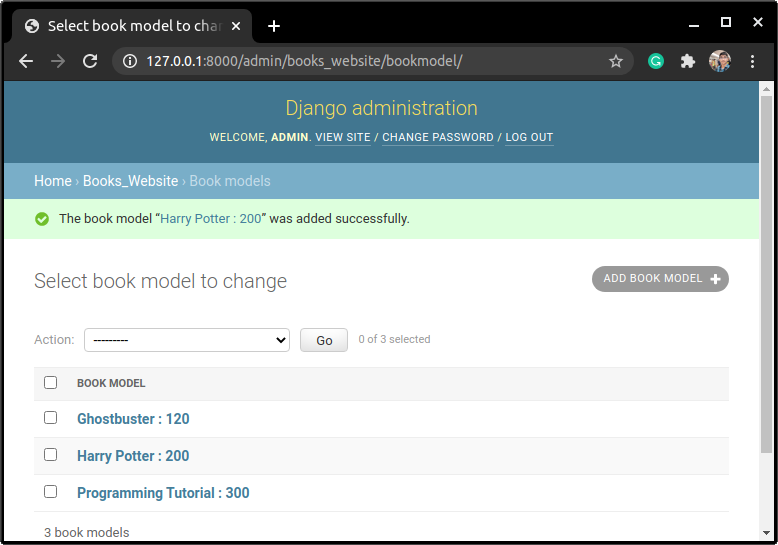
Django Default Admin Interface
The default Django admin site as you would have seen, looks like this:

The default interface has minimal features and is not that user friendly. But Django does provide a way to make our own admin site interface; that is by using the Django ModelAdmin Library.
We will now work with ModelAdmin and see how we can modify the admin page according to our needs.
Customizing the Django Admin Interface with ModelAdmin Library
To use Model Admin, we would need some Model Tables to work on. So here is a simple Model:
class SampleBookModel(models.Model):
    Name = models.CharField(max_length = 80)
    Price = models.IntegerField()
    Genre = models.CharField(max_length = 80)
    Description = models.TextField()
In the subsequent sections, we will modify the display page for this model itself.
Editing the Model Admin Class
Model Admin is a part of the admin library in Django. To use it, we must import admin:
from django.contrib import admin
The basic syntax for a Model Admin class is as shown:
#Decorator
@admin.register(BookModel)
class BookModelAdmin(admin.ModelAdmin):
    #Fields
    fields =('<model_field_names>')

    #List Display
    list_display = ('<model_field_names>')

    #List_filter
    list_filter = ('<model_field_names>')

    #ordering
    ordering = ('<model_field_names>')

    #fieldsets
    fieldsets =(
                ('Required information',{
                    'description' : '<'description_sentence>',
                    'fields':('<model_fields'>)
                }),
                ('Optional Information',{
                    'classes' : ('<class_options',),
                    'fields': ('<model_fields>')
                })
        )
We will now look at them individually
1. decorators
Python provides an exciting feature decorator, which is used to add functionalities to existing code. It is used with an @ symbol.
You can know more about it in the Python decorators article. The basic syntax of the admin site registry decorator is:
@admin.register(<Model_Name>)
Note: Its function here is the same as that of the line:
admin.site.register(<Model_Name>, <Model_admin_class>)
Using decorators is just another way to register the Models in the admin site. The only difference, in this case, is to add the model admin class along with the model as an argument.
2. fields
Fields specifies the order and position of the Model Fields on the webpage.
Note: Input(fields) should be given as tuples.
fields =(('field1','field2'),'field3','field4')
To display two fields on the same level, add them as a tuple in the tuple.
For example: In the above code: Field 1 and Filed two will be displayed at the same level—field three below them and Field 4 at last.
3. list_display
In the example shown above, the web page only displays one Heading “Book Model.” To add more column headings like that, we use the list_display attribute.
Note: The input (Column Headings) should be given as tuples.
The syntax for list_display:
list_display = ('<Heading1','Heading2')
4. list_filter
The Default interface does not provide a Filter-by option. But we can add it using the list_filter option.
With the Filter_by option in hand, we can search for Table elements way quicker.
Note: The Input should be given as tuples.
list_filter = ('<filter-by:Field_Name>',)
5. ordering
The ordering attribute specifies the order in which the Table elements will be displayed on the webpage.
Note : The input should be given as tuples.
ordering = ('<Field_Name>',)
6. fieldsets
fieldsets attribute is just another way of displaying fields, just like the fields attribute.
On many websites, information is often displayed under optional information tag, which we can see after pressing the “Click to View” option.
fieldsets do exactly that!! The syntax is similar to the Python dictionary inside tuples.
The syntax for fieldsets is as shown:
fieldsets =(
            ('Required information',{
                'description' : '<'description_to_display>',
                'fields':('<Field_Names'>)
            }),
            ('Optional Information',{
                'classes' : ('<display_options>',),
                'fields': ('<Field_Names>')
            })
    )
Below are some not that often used Model Admin attributes:
- empty_value_display
- exclude
- list_editable
- readonly_fields
Customizing Fields in the Django Admin Template using Admin Class
With the understanding of the variables clear, we can now move to modifying the front-end fields on on the Admin Template.
We will change the look of the SampleModel Django Admin Template, mentioned in the pre-requisites section
In admins.py add the code:
@admin.register(SampleBookModel)
class SampleAdminModel(admin.ModelAdmin):
    fieldsets =(
            ('Required information',{
                'description' : 'These fields are compulsory',
                'fields':(('Name','Price'),'Genre')
            }),
            ('Optional Information',{
                'classes' : ('collapse',),
                'fields': ('Description',)
            })
    )
    list_display =('Name','Price')
    list_filter = ('Genre',)
    ordering =('Name',)
From the code, try to guess where each element will be displayed. We will see whether your guess was correct or not, in the next section!
Implementation of Model Admin Class
Did you guess it right? Have a look at the output.


Conclusion
That’s it, coders!! That was all about Django Admin Templates and how to use the Model Admin Class. Do check out the Django Admin Site article for more information about the admin site.
See you in the next article !! Keep Coding !!


