🚀 Supercharge your YouTube channel's growth with AI.
Try YTGrowAI FreeDjango User Authentication – Allow Signup and Login Using Django
In this article, we will learn Django user authentication along with the all the basics for the same. But before that let us learn little bit about websites.
Static vs. Dynamic websites
Let’s have a quick look at the differences between a static and dynamic website.
| Static Website | Dynamic Website |
|---|---|
| Static website displays fixed information to users | Dynamic websites can display different information based on the viewer |
| No client-server interaction | A lot of data interchange between the user and the servers |
| Faster, cheaper, and easy to main if you don’t need to update your data frequently | Is important when we need users to interact with the website. Dynamic websites ca be fast and easy to maintain with the right CMS |
| Directly displays what’s on the server by rending the HTML, JS, and CSS files. | Displays the front-end based on what’s available on the database, stored for the user |
User Authentication
Nowadays almost all the websites have user authentication processes where you create an account either manually or through the google/Facebook account ids. A typical user authentication page looks like this:
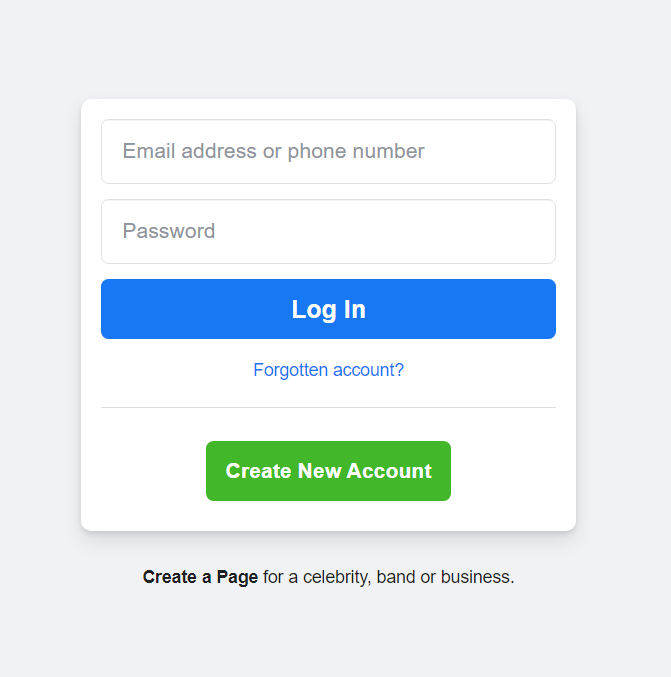
User authentication is an important process since it secures all the user content in such a way that it can be accessed only by the particular user. In Django, this is done using the django.contrib.auth library.
Also, there are different types of users based on their roles and permissions possible.
Types of Users
Though users can be divided into many categories and types, there are two major user roles. The ones that have edit access to the website, and the ones that don’t.
Superusers
You have come across a superuser in the admin site article. The superuser is the topmost admin of the project who has access to all the contents of the admin site.
He can also delete other General users.
Regular Users
The people who visit the site can create this type of user accounts. For example, all Facebook and Google accounts fall into this category of users.
Their permissions can vary depending on the type of role they play. The superuser/the admin decides the permissions assigned to each user. For example, in a classroom app, students will have different permissions while the teacher will have other additional permissions.
Using Django.contrib.auth Library for Using Authentication
Django framework has a full authentication library, known as the django.contrib.auth library, inbuilt to provide the authentication framework.
Hence in this article, we work with the inbuilt .auth library itself. We will now look into the essential attributes provided by the library:
1) authenticate
The basic syntax is:
user = authenticate(request=None , credentials)
The authenticate attribute has a slight difference in syntax for the signup and the sign-in View. In the signup view, it takes only the request credentials as arguments.
user = authenticate(username = "<username>", password = "<pasword>")
Note: The username and password are the credentials taken from the request itself.
- In the sign-in view, it takes a request credential (username, password), as well as the stored username and password.
user = authenticate(request, username="<stored_username>",password ="<stored_password>")
Here the request credentials, included in “request,” are matched with the username and password credentials stored in the DB. Only if the crendentials match, the user is authenticated.
2) login(request,user_information)
The login function is used to log-in the users into the website. The syntax:
login(request,user)
where the user is:
user = authenticate(username,password)
3) logout(request)
Logout attribute simply log-outs the user currently logged-in. The syntax:
logout(request)
4) AuthenticationForm
AuthenticatioForm is the pre-built form present in the django.contrib.auth.forms. This form is displayed on the Django sign-in page of the web application. The fields present are:
- Username
- Password
5) CreateAuthenticationForm
This prebuilt form in django.contrib.auth.forms is displayed on the Django sign-up page. The fields present in the forms are:
- Username
- Password1
- Password2(password confirmation field)
Now that we know what the auth library holds, let’s dive into the coding part!!
Hands-On with Django User Authentication
Okay!! Enough with the reading part, let’s now get our hands dirty.
We should have something to show once a user is logged in right !! So let us create a simple View and template
1) Code for Sample View
Add the simple BookView code into the views.py file
from django.shortcuts import render
def books(request):
    if request.user.is_authenticated:
        return render(request, 'itemsapp/books.html')
    else:
        return redirect('/books/signin')
2) Code for sample template
We will create a sample books template showing a list of books:
<h> Welcome to the Book Website</h>

<h2>List of Books</h2>
<ul><h3> The Prodigal Daughter</h3></ul><br>
<ul><h3> Deception Point</h3></ul><br>
<ul><h3> Washington Times</h3></ul><br>
<ul><h3> Sherlock Holmes</h3></ul><br>
<ul><h3> The Cooper Intrigue</h3></ul><br>

<a href = "{% url 'logout' %}">Logout here</a>
3) Creating the Sign-up View
In Views.py, add the Sign-up View code:
from django.contrib.auth import authenticate,login
from django.contrib.auth.forms import UserCreationForm

def signup(request):

    if request.user.is_authenticated:
        return redirect('/books')

    if request.method == 'POST':
        form = UserCreationForm(request.POST)

        if form.is_valid():
            form.save()
            username = form.cleaned_data['username']
            password = form.cleaned_data['password1']
            user = authenticate(username = username,password = password)
            login(request, user)
            return redirect('/books')

        else:
            return render(request,'itemsapp/signup.html',{'form':form})

    else:
        form = UserCreationForm()
        return render(request,'itemsapp/signup.html',{'form':form})
The Sign-up Template for the webpage will be:
<form method ='post'>
    {% csrf_token %}
    {{form.as_p}}
    <input type="submit" value = "Submit">
</form>

<h3>Already Have an Account??</h3>
<a href = "{% url 'login' %}">Sign In Here</a>
4) Creating the Sign-in View
Now below the sign up view, add the following Sign-in View into your views.py
from django.contrib.auth import authenticate,login
from django.contrib.auth.forms import AuthenticationForm

def signin(request):
    if request.user.is_authenticated:
        return redirect('/books')

    if request.method == 'POST':
        username = request.POST['username']
        password = request.POST['password']
        user = authenticate(request, username =username, password = password)

        if user is not None:
            login(request,user)
            return redirect('/books')
        else:
            form = AuthenticationForm()
            return render(request,'itemsapp/signin.html',{'form':form})

    else:
        form = AuthenticationForm()
        return render(request, 'itemsapp/signin.html', {'form':form})
The Sign-in Template for the Webpage will be:
<form method = 'post'>
    {% csrf_token %}
    {{form.as_p}}
    <input type = "submit" value = "Submit">
</form>

<h3>Dont have an account??</h3><br>
<a href = "{% url 'signup' %}">SignUp Here</a>
5) Creating the Logout View
Finally, we will add the Log-out View code into the views.py file:
from django.contrib.auth import logout

def signout(request):
    logout(request)
    return redirect('/books/signin/')
6) Mapping URLs to the Views
The URL paths for the Views coded in the above section will be:
    path('books/signup/', signup, name ='signup'),
    path('books/signin/', signin, name = 'login'),
    path('books/signout/', signout, name = 'logout'),
Implementation of the code
Now that we have seen each of the individual sections of code, here is the final code for the views.py file.
from django.shortcuts import render,redirect
from django.contrib.auth import authenticate,login,logout
from django.contrib.auth.forms import AuthenticationForm,UserCreationForm

def signup(request):

    if request.user.is_authenticated:
        return redirect('/books')

    if request.method == 'POST':
        form = UserCreationForm(request.POST)

        if form.is_valid():
            form.save()
            username = form.cleaned_data['username']
            password = form.cleaned_data['password1']
            user = authenticate(username = username,password = password)
            login(request, user)
            return redirect('/books')

        else:
            return render(request,'itemsapp/signup.html',{'form':form})

    else:
        form = UserCreationForm()
        return render(request,'itemsapp/signup.html',{'form':form})


def signin(request):
    if request.user.is_authenticated:
        return redirect('/books')

    if request.method == 'POST':
        username = request.POST['username']
        password = request.POST['password']
        user = authenticate(request, username =username, password = password)

        if user is not None:
            login(request,user)
            return redirect('/books')
        else:
            form = AuthenticationForm()
            return render(request,'itemsapp/signin.html',{'form':form})

    else:
        form = AuthenticationForm()
        return render(request, 'itemsapp/signin.html', {'form':form})


def signout(request):
    logout(request)
    return redirect('/books/signin/')
And the final code for the urls.py will be:
from django.contrib import admin
from django.urls import path,include
from .views import signup,signin,signout,books

urlpatterns = [
    path('books/', books),
    path('books/signup/', signup, name ='signup'),
    path('books/signin/', signin, name = 'login'),
    path('books/signout/', signout, name = 'logout'),
]
That’s it!! Now fire up the server and go to “/books”
When you go to the endpoint “books/”, if you are not authenticated, it will first redirect you to the sign-in webpage.
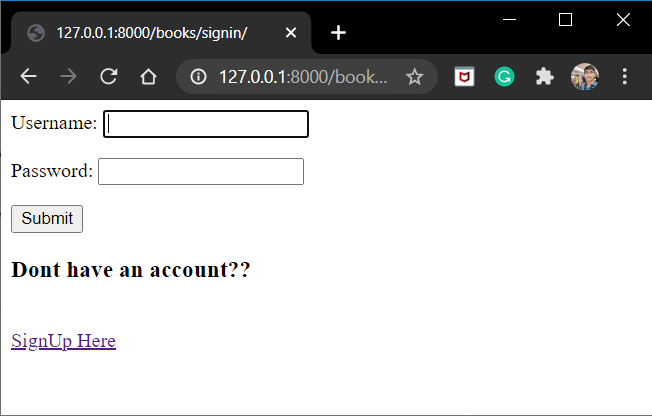
Now if you don’t have an account click the link below and you will the sign-up webpage.

Fill in the details and then hit enter you will be redirected back to the book’s webpage. Now that you are authenticated, the Books List will be displayed.

Once you are done, you can press log out, and you will be redirected to the Log-in webpage again.
Voila !! You now have your own user authentication system !!
Conclusion
That’s it, guys !! This was all about user authentication and how to implement it. I hope this article helped you gain knowledge about user authentication.
See you in the next article!! Till then keep practicing!!


