🚀 Supercharge your YouTube channel's growth with AI.
Try YTGrowAI FreeComplete Basics of the Django Admin Site

Django comes with a very powerful admin interface. This takes up the information regarding models from models.py and reverts back a quick-simple model-centric interface.
In the admin interface, the users can interact with the Model table and perform tasks like adding/deleting elements, etc tasks in a very easy and efficient way.
Also, Django gives us an opportunity to edit/change the default admin interface using Admin Class Models present in the admin library.
Getting Started with the Django Admin Site
Now before we can access the Django admin interface, we need to create a superuser. Let’s take the steps to create the superuser for our admin site now.
Creating a superuser
If you try to go onto the admin/ endpoint (host website/admin), you will see that a username and password is required. These are the username and password of a superuser of the web application.

A superuser is like the topmost admin of the site and has the following uses:
- Has the entire power to delete, change, add new elements to the tables.
- Can also create new users (as well as superusers) and assign different user permissions to these users.
To create a new superuser we write the code below in the shell
python manage.py createsuperuser
It will then ask for a username, email, and password. Enter the details and then the superuser will get created.

Now we can log-in to the admin site (/admin) with the username and password we just created.
Once we are logged in, the admin site looks like this.

2. Registering models for the admin site
The previous image shows us the default admin-interface. For now, we will work on this interface itself and register the models to this site.
For that, go to admin.py and write:
from django.contrib import admin
from .models import BookModel, AuthorModel

admin.site.register(BookModel)
admin.site.register(AuthorModel)
admin.site.register(<model_name>,<admin_model>) – This is a function that registers the model in the bracket to the admin site and hence the name admin.site.register .
For now, we will put BookModel and AuthorModel itself as the argument.
We will learn about the second argument <admin_model> in a while.

The server should auto-restart when you modify the files but if it doesn’t, you can run the runserver command again:
manage.py runserver

Now you will be able to see that the admin site is displaying BookModel as well as the AuthorModel.
Let’s get to editing the models from the web interface.
Editing Model Table elements through Admin site
Now that we have our tables registered in the site, we can try to add new elements/ delete /edit them.
1. Add New Objects
In the admin site, select the Author Model, and then on the top right, you will see an add new object option.
Click that to add a new Author Model object.

Similarly, let’s add a few more authors into the table.
2. Edit/Modify Existing Objects
If you want to change any element that you saved before, you can click on it and the below page will appear again.
You can now edit them, and once done click on save to save the new values.

Here you can see save and continue editing or save options, which can be used to save the edited object.
3. Delete Objects
Click on the element you want to delete and then you will the below page.
A delete option in red just below the fields will appear, just click on that delete button and that particular object will get deleted.

See how simple it is to add or change the elements from the table in the admin site (as compared to the long way in python shell!)
Foreign Key linking with the Django admin interface
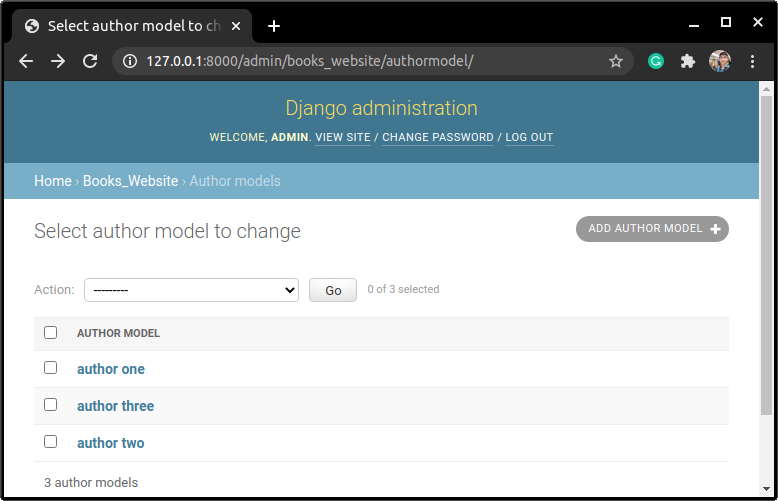
In the last article, we saw how we linked two Django models using a foreign key. Now if you go in the admin section >> AuthorModel, you can see that I have added three authors.

Now in the BookModel table, when you try to add a new book, in the author_id field you will start getting a drop-down list for author_id.
This is because of the foreign key linking that we did, because of which we can now easily select an author from the AuthorModel list.

Instead of adding author names again and again for all the books, we can just link the two models (BookModel and AuthorModel) and then select from the drop-down list.
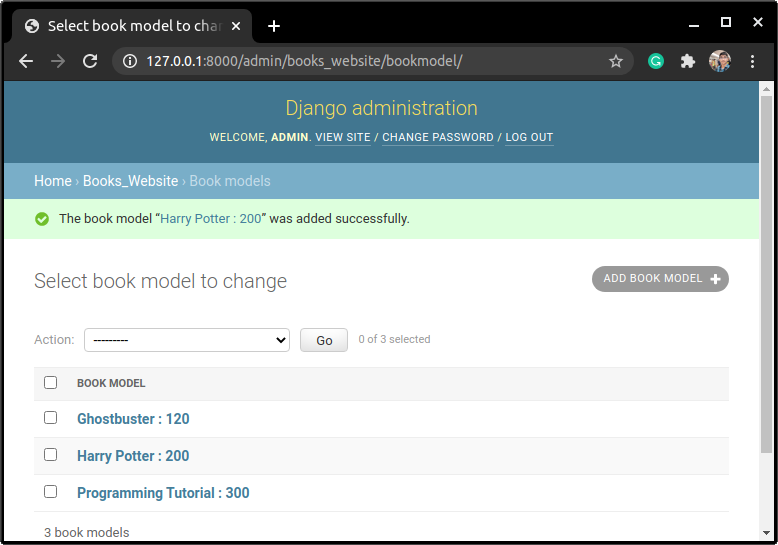
Now add let us add a few books for each Author.
Here, I have selected author 1 for both Ghostbuster and Harry Potter and author 2 for the Programming tutorial
Now, we will see another functionality of foreign keys. Let us say the author one decided to delete his account and hence removes his account author one from AuthorModel.
Delete author 1 from AuthorModel


Now, if we go to BookModel, you will see all the books written by author one have been automatically deleted.

This is the advantage that we get by using FK.
Changing the Interface View
Now that we know how the default interface works, let us try to change some of the aspects of this interface using admin Models.
The syntax:
#Decorator
@admin.register(BookModel)
class BookModelAdmin(admin.ModelAdmin):
    #Fields
    fields =('<model_field_names>')

    #List Display
    list_display = ('<model_field_names>')

    #List_filter
    list_filter = ('<model_field_names>')

    #ordering
    ordering = ('<model_field_names>')

    #fieldsets
    fieldsets =(
                ('Required information',{
                    'description' : '<'description_sentence>',
                    'fields':('<model_fields'>)
                }),
                ('Optional Information',{
                    'classes' : ('collapse',),
                    'fields': ('<model_fields>')
                })
        )
Let’s go over each of the elements one by one below.
1. Decorator
The first line admin.register(BookModel) is known as a register and is used with a @ symbol before the class it is being applied on.
Its function is similar to that of admin.site.register. This just a different way of registering the model along with adminModel. But if you don’t want to use this then you have to add the admin model using the method mentioned earlier.
admin.site.register(BookModel,BookModelAdmin)
2. Fields
This option lets you arrange the order and the position the model Fields are to be displayed in the admin interface.
Note: This option takes the input (of Fields) as tuples.
fields =(('title','price'),'genre','author_id')
Here you can see the order in which I want the fields to be there.
If you want more than one field to display on the same horizontal level then we add them both together as a tuple. (as shown in the code)
3. list_display
Now if you see the image, there is only one heading “Book Model”. Now if you want to show different heading then we use this option called list_display.
Hence this option lets you choose what all fields to display at the page shown above.
Note: This option takes input as tuples.
list_display = ('title','price')
4. list_filter

As you can see, in the default interface., there is no filter-by option. Using list_filter creates a filter-by option on the page shown above. This helps us to search for a particular element in the table quickly.
Note: This option takes input as tuples.
list_filter = ('genre',)
5. ordering
Just like the MetaClass we saw in Django Models, ordering here has the same functionality. We can specify the order in which the elements of a particular field will be displayed.
The syntax is similar to that of the ordering in the MetaClass models.
Note : This option takes input as tuples.
ordering = ('title',)
6. Fieldsets
This is another way of mentioning the fields that we saw above.
As you would have seen on many websites, there is optional information that you can see after clicking a show more button. Fieldsets give us the same ability to keep some of the fields as optional while some as required.
The syntax for this is a bit confusing, try to understand the code given below:
fieldsets =(
            ('Required information',{
                'description' : '<'description_sentence>',
                'fields':('<model_fields'>)
            }),
            ('Optional Information',{
                'classes' : ('collapse',),
                'fields': ('<model_fields>')
            })
    )
There are many other similar admin options available in the admin library that can be used like:
- Empty_value_display
- exclude
- list_editable
- readonly_fields
Now let us change the admin interface for both BookModel and AuthorModel.
Changing BookModel View in the admin site
Let us change the look of the BookModel using the various admin options
@admin.register(BookModel)
class BookModelAdmin(admin.ModelAdmin):

    fields =(('title','price'),'genre','author_id')
    list_display = ('title','price')
    list_filter = ('genre',)
    ordering = ('title',)
Note: For a single value tuple, we need to include a comma sign “,” at the end to indicate Python that it is a tuple.
Here:
- We kept title and price at the same horizontal level
- List-display of both title and price
- Filtering by genre
- Alphabetical ordering of elements according to the title
Now lets run the server and check.


Changing AuthorModel view in the admin site
Similarly, let us change the look of AuthorModel using the admin options learned above as well.
@admin.register(AuthorModel)
class AuthorModelAdmin(admin.ModelAdmin):

    fieldsets =(
            ('Required information',{
                'description' : 'These fields are compulsory',
                'fields':('first_name',)
            }),
            ('Optional Information',{
                'classes' : ('collapse',),
                'fields': ('last_name',)
            })
    )

    list_display =('first_name','last_name')
    ordering =('first_name',)
here
- The first name is used under required information
- The last name is used under optional information
- List-display of both the first and the last name
- Alphabetical Ordering of elements according to the first name
Now lets run the server and check.


Miscellaneous Options in the Django admin site
On the home page of the Django admin site, there are some other options already present like the users, groups.

Users option is used to handle the superusers as well as handle the permissions for each user.

All elements displayed on the screen are clickable and the user permissions can be edited by clicking on them, and modifying the set of permissions.


Conclusion
That’s it, guys. We have reached the end of this article. In the next section, we will learn about Templates. Stay tuned for more Django and Flask articles in the next few days. Keep coding !!!


