🚀 Supercharge your YouTube channel's growth with AI.
Try YTGrowAI FreeHow to Scrape Google Search Results using Python Scrapy

Have you ever found yourself in a situation where you have an exam the next day, or perhaps a presentation, and you are shifting through page after page on the google search page, trying to look for articles that can help you?
In this article, we are going to look at how to automate that monotonous process, so that you can direct your efforts to better tasks.
For this exercise, we shall be using Google collaboratory and using Scrapy within it. Of course, you can also install Scrapy directly into your local environment and the procedure will be the same.
Looking for Bulk Search or APIs?
The below program is experimental and shows you how we can scrape search results in Python. But, if you run it in bulk, chances are Google firewall will block you. If you are looking for bulk search or building some service around it, you can look into Zenserp.
Zenserp is a google search API that solves problems that are involved with scraping search engine result pages. When scraping search engine result pages, you will run into proxy management issues quite quickly. Zenserp rotates proxies automatically and ensures that you only receive valid responses.
It also makes your job easier by supporting image search, shopping search, image reverse search, trends, etc. You can try it out here, just fire any search result and see the JSON response.
Initializing Google Colaboratory
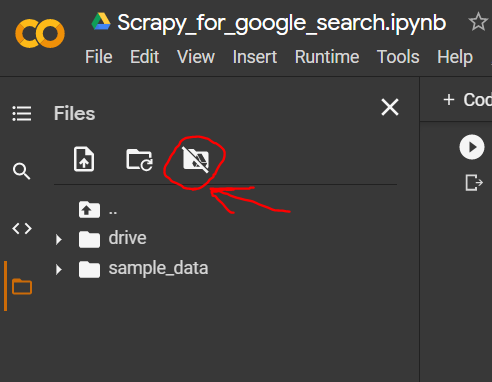
Go to https://colab.research.google.com/ and sign in with your Google Account. Go to File > Create New Notebook. Then go to this icon and click. Click on the confirmation button:
Now this will take a few seconds. Then in the code region, type:
!pip install scrapy
This will install Scrapy within Google colab, since it doesn’t come built into it. Next, we import our packages:
import scrapy
import pandas
Remember how you mounted the drive? Yes, now go into the folder titled “drive”, and navigate through to your Colab Notebooks. Right-click on it, and select Copy Path.
Now in the code editor, enter:
%cd "/content/drive/My Drive/Colab Notebooks/"
Now we are ready to initialize our scrapy project, and it will be saved within our Google Drive for future reference.
Enter into the code editor:
!scrapy startproject google_crawler
This will create a scrapy project repo within your colab notebooks. If you couldn’t follow along, or there was a misstep somewhere and the project is stored somewhere else, no worries. We can simply move it:
!mv google_crawler "/content/drive/My Drive/Colab Notebooks/"
Once that’s done, we’ll start building our spider.
Building the Python Scrapy Spider
Open the google_crawler repo. You’ll find a “spiders” folder inside. This is where we’ll put our new spider code.
So, create a new file here by clicking on the folder, and name it. We start with the package imports:
import scrapy
from scrapy.linkextractors import LinkExtractor
import pandas as pd
You don’t need to change the class name for now. Let’s tidy up a little bit.
Remove the allowed_domains line, because we don’t need it. Change the name.
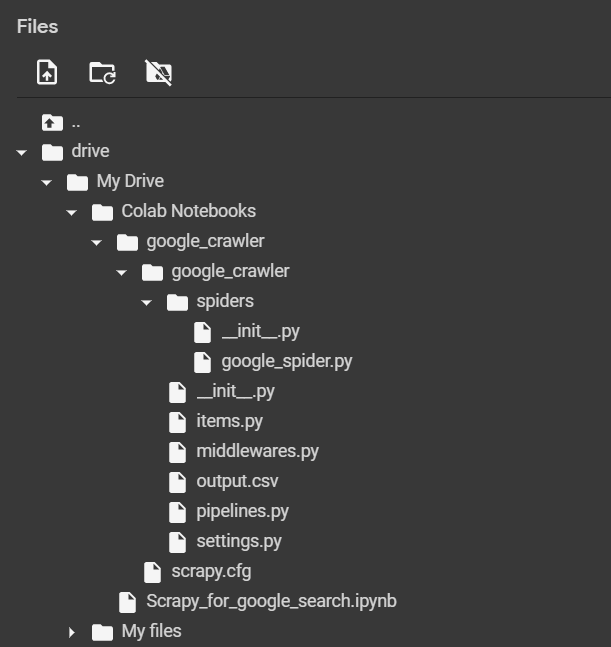
Here’s how the file system looks (for reference):
This is the name of our spider, and you can store as many spiders as you want with various parameters. In the start_urls list, we can add our google search:
class firstSpider(scrapy.Spider):
  name = "basic"
  start_urls = [
    "https://www.google.com/search?q=journal+dev"
   ]
Now, let’s create our parse function, and use our link extractor to fetch the link:
def parse(self, response):
    xlink = LinkExtractor()
    for link in xlink.extract_links(response):
      print(link)
In the code editor, run it using:
!scrapy crawl basic
We see that there are more than a few links here, and many of them are mostly Google.com searches, so we can filter them out with an if condition:
def parse(self, response):
    xlink = LinkExtractor()
    for link in xlink.extract_links(response):
      if len(str(link))>200 or 'Journal' in link.text:
        print(len(str(link)),link.text,link,"\n")
And voila ! Here we run the spider again, and we get only the links that are related to our website along with a text description.

We are done here.
Putting it into a DataFrame
However, a terminal output is mostly useless. If you want to do something more with this (like crawl through each website on the list, or give them to someone), then you’ll need to output this out into a file. For this, we will use pandas:
def parse(self, response):
df = pd.DataFrame()
xlink = LinkExtractor()
link_list=[]
link_text=[]
for link in xlink.extract_links(response):
if len(str(link))>200 or 'Journal' in link.text:
print(len(str(link)),link.text,link,"\n")
link_list.append(link)
link_text.append(link.text)
df['links']=link_list
df['link_text']=link_text
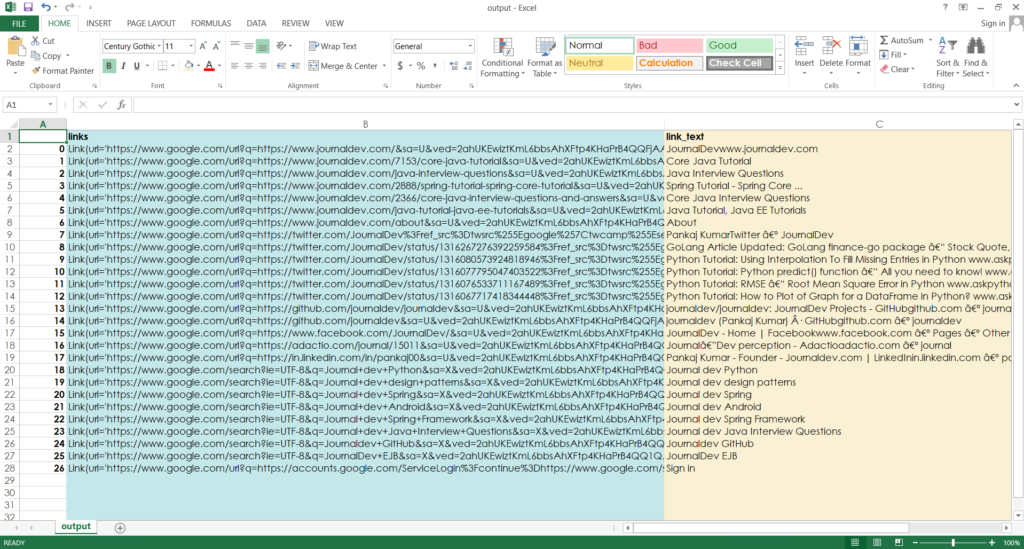
df.to_csv('output.csv')
And now if we run this, we get an output file called “output.csv“:
Extracting meta-Descriptions
We can go one step further, and also access the description below the text:

So we’ll modify the parse function. We use response.xpath(//div/text()) to get all the text present in the div tag. Then by simple observation, I printed in the terminal the length of each text and found that those above 100 were most likely to be desciptions. Since they are fetched in the same order as the links, we have no problem lining them up:
  def parse(self, response):
    df = pd.DataFrame()
    xlink = LinkExtractor()
    link_list=[]
    link_text=[]
    divs = response.xpath('//div')
    text_list=[]
    for span in divs.xpath('text()'):
      if len(str(span.get()))>100:
        text_list.append(span.get())
    for link in xlink.extract_links(response):
      if len(str(link))>200 or 'Journal'in link.text:
        #print(len(str(link)),link.text,link,"\n")'''
        link_list.append(link)
        link_text.append(link.text)
    for i in range(len(link_text)-len(text_list)):
      text_list.append(" ")
    df['links']=link_list
    df['link_text']=link_text
    df['text_meta'] = text_list
    df.to_csv('output.csv')
So now if we run our code, we get a fourth column:

And that’s it !
If you missed any of that, you can just view all the code here: https://github.com/arkaprabha-majumdar/google-crawler
Thank you for reading. Check out the other articles, and keep programming. Cheers.


