🚀 Supercharge your YouTube channel's growth with AI.
Try YTGrowAI FreeTkinter Entry Widget

Hello again! This is another post in our Tkinter tutorial series and today we’ll be covering the Tkinter Entry Widget.
Last time, we went through the concept of a Tkinter Canvas window. This time, we’ll do something different.
Today’s post is on the Tkinter Entry widget. Any widget is a part of the main application. The entry widget is very useful if you want to get input from the user.
We can create an Entry widget in our main application and also add input text boxes for our application, so that the user can type something on it.
Let’s get started!
Tkinter Entry Widget
This widget allows us to enter a single line of text.
If we enter a string which exceeds the length of the widget, we must scroll down for the next part.
This is useful if you want to get the user input for small fields, like a name and phone number.
Let’s now take a look at how we can use this in our application.
Syntax of an Entry Widget
To declare an entry widget, we can use the following type of syntax:
entry_object = tk.Entry(master, option, ... )
This takes in the master object handle for our parent window. This will indicate where we can place the entry object.
We can provide certain options using the option parameter, such as which row and column you want it to be placed.
Step 1: Create Labels for our application
But before that, let’s create a Label widget for our application. We can use this to name a block of text.
NOTE: We cannot use a canvas alongside other widgets like a label since we are using canvas.pack(). These are for different purposes altogether.
Although we cannot use Canvas, let’s replicate a similar template for our Application from the previous tutorial.
import tkinter as tk

class Application(tk.Frame):
	def __init__(self, master=None):
		# We need the master object to
		# initialize important stuff
		super().__init__(master) # Call tk.Frame.__init__(master)
		self.master = master # Update the master object after tk.Frame() makes necessary changes to it

# Create our master object to the Application
master = tk.Tk()
# Create our application object
app = Application(master=master)
# Start the mainloop
app.mainloop()
To create a Label widget, use the following syntax:
tk.Label(master, text).grid(row)
This will insert it into row number of the man application grid, with the text string!
Let’s now write it for our class. We’ll write a function called createGridLabel which does this for us.
	def createGridLabel(self, text, row_number):
		# Create a label with the text, on the row number
		tk.Label(self.master, text=text).grid(row=row_number)
Now, let’s look at the whole program.
import tkinter as tk

class Application(tk.Frame):
	def __init__(self, master=None):
		# We need the master object to
		# initialize important stuff
		super().__init__(master) # Call tk.Frame.__init__(master)
		self.master = master # Update the master object after tk.Frame() makes necessary changes to it
	def createGridLabel(self, text, row_number):
		# Create a label with the text, on the row number
		tk.Label(self.master, text=text).grid(row=row_number)

# Create our master object to the Application
master = tk.Tk()
# Create our application object
app = Application(master=master)
# Create a label with the following text, on row #0
app.createGridLabel("Name", 0)
app.createGridLabel("Phone Number", 1)
# Start the mainloop
app.mainloop()
Output
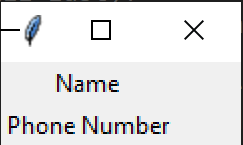
Although the image is very small, the labels are indeed on the screen! Let’s now go to the actual Entry widgets for these labels.
We can create our entry objects using tk.Entry(master)
# Create the entry objects
e1 = tk.Entry(master)
e2 = tk.Entry(master)
Now, let’s place the entries in their proper positions. The first entry belongs to row 0 and column 1 (as column 0 has our label Name), while the second entry widget is at (1, 1).
# Place it in it's suitable position
e1.grid(row=0, column=1)
e2.grid(row=1, column=1)
Let’s now look at the full code now.
import tkinter as tk

class Application(tk.Frame):
	def __init__(self, master=None):
		# We need the master object to
		# initialize important stuff
		super().__init__(master) # Call tk.Frame.__init__(master)
		self.master = master # Update the master object after tk.Frame() makes necessary changes to it
	def createGridLabel(self, text, row_number):
		# Create a label with the text, on the row number
		tk.Label(self.master, text=text).grid(row=row_number)

# Create our master object to the Application
master = tk.Tk()

# Create our application object
app = Application(master=master)

# Create a label with the following text, on row #0
app.createGridLabel("Name", 0)
app.createGridLabel("Phone Number", 1)

# Create the entry objects
e1 = tk.Entry(master)
e2 = tk.Entry(master)

# Place it in it's suitable position
e1.grid(row=0, column=1)
e2.grid(row=1, column=1)

# Start the mainloop
app.mainloop()
Output

As you can see, not only does it display a text box, but I’m also able to type on it!
What if you want to place some default placeholder values for these fields? Well, it’s very simple, and requires only one line of code per entry!
We can use entry.insert(0, text), where text is the required value for the textbox.
Let’s put AskPython and 12345678 on these two fields as the default values now.
e1.insert(0, "AskPython")
e2.insert(0, "12345678") # Must be a string, not an integer
Output

Hopefully, this works for you too. We’ve successfully added default values to our application!
Conclusion
In this tutorial, we learned how we could use the Entry widget using Tkinter.
Stay tuned for more tutorials on Tkinter!


