🚀 Supercharge your YouTube channel's growth with AI.
Try YTGrowAI FreeDjango URL mapping – A How-to Guide

In this tutorial, we are going to learn more about Django URL mapping and how to link up the URL request and the corresponding View.
We will understand how and what we exactly did in the first article to display Django Hello World at the sayHello/ page that we entered at the end of the tutorial.
Let’s begin by understanding the Django URL Library.
Basics of the Django URL Library
Here in the django.urls library, we have various functions that we are gonna use in our web application. Let’s learn more about them.
1. path(route,view, kwargs, name)
This function returns an element that needs to be included in urlpatterns. That is, path acts as a link between an element (for eg Views) and its URL.
1. route
This is the URL for a particular view. For eg: ‘<name>/’ is a route.
So when we request this page from the URL, the server will return the view linked to it.
2. view
Here we need to write, the view name that we need to link. Or use the function “include” to add another urls.py file. (Like in the project/urls.py file)
3. **kwargs and *args
args in function definition in python is a syntax used for the variable input argument list.
It is used with a single asterisk.
That is if for example, we need to input any variable number of arguments for a function, then we use *args. For eg let’s look at an example
def myFun(*args):
    for arg in args:
        print(arg)


myFun("Hello","There","Hi","There")
So here we can give any number of arguments and *args will take up all of them. We can think that all the arguments are being saved by arg as some list, thereby using the line for arg in args, we are taking each element from the list.
the * is splitting up the list into elements thus *args gives you all the elements separately and args will give the elements as a list.
So if you will run the above code, you will get

kwargs in function definitions in Python are used for key-worded, variable arguments list.
It is used with double asterisk.
That is if for example, we need to input any variable number of arguments (key-worded) for a function, then we use **kwargs. For eg. let’s look at an example then you will get more clarity about what exactly key-worded means
def myFun(**kwargs):
    for item,price in kwargs.items():
        print(f"{item}={price}")

myFun(Book=100,Pen=10,Watch=4000)
As you can see in the above example, we are able to pass complete values. The variable names and the values held by those variables with the use of the assignment operator.
We can think of the arguments being saved as a Python dictionary by the kwargs thus by using the line for the item, price in kwargs.items(), we are taking up the item(Book, Pen, etc) and their corresponding price(100,10, etc).
The ** splits the dictionary into its elements. Thus **kwargs gives you all the key-worded elements separately while kwargs gives you the key-worded elements as a dictionary.

Here in Django path(), we can use kwargs if we need to send more information to the view along with the URL route.
For eg
path('name/<int:id>',views.name_id,{"foo":"bar"})
By using the URL name/25, Django will call views.name_id( request, id = 25, foo =’bar’).
3. name
Name is used to specify the name of the particular view that the URL is linking.
2. include(module,namespace=None)
This function takes another URL conf file that should be included by using this include function. That is to form a link with another urls.py file you should use include function. The namespaces can also be written inside but we don’t need to do that for now.
How to Map a URL to a View in Django?

Here we are using path() function with the syntax learnt above:
path(‘ ’, sayHello, name = ‘sayHello’)
Here sayHello is the function-based View name in views.py. We’re keeping the path as a blank string so we can access the view directly on the base directory – http://127.0.0.1:8000/ in my case.
URL mapping in Django Project
The path() function is linking the URL to the urls.py file present in the app. So we need the include() function with the syntax we learned above.
For example, here we used:
path(‘sayHello/’,include(‘HellpWorldApp.urls’))
Apart from the path and include functions there are re.path() and register_converter() functions which we won’t be using much in our course of Python-Django.
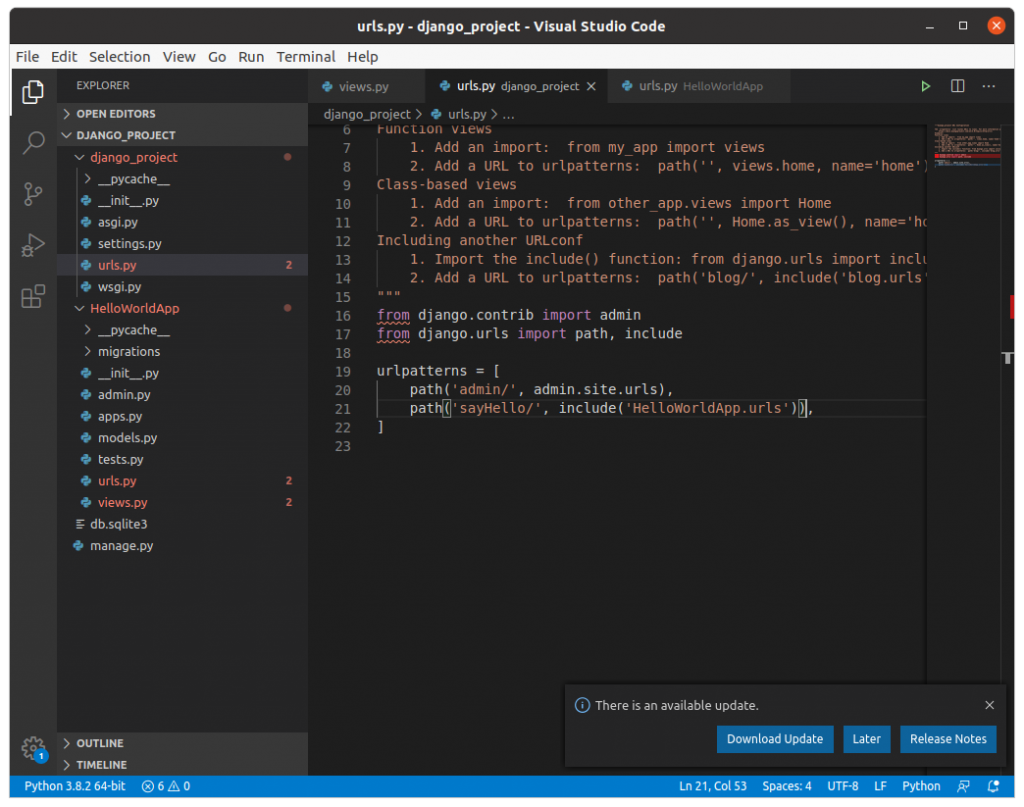
Note: in project/urls.py we used:
path(‘sayHello/’, include(HelloWorldApp.urls)),
Now here even if we write sayHello/ in app/urls.py and simply ‘ ’ in project/urls.py, the behavior will be the same.
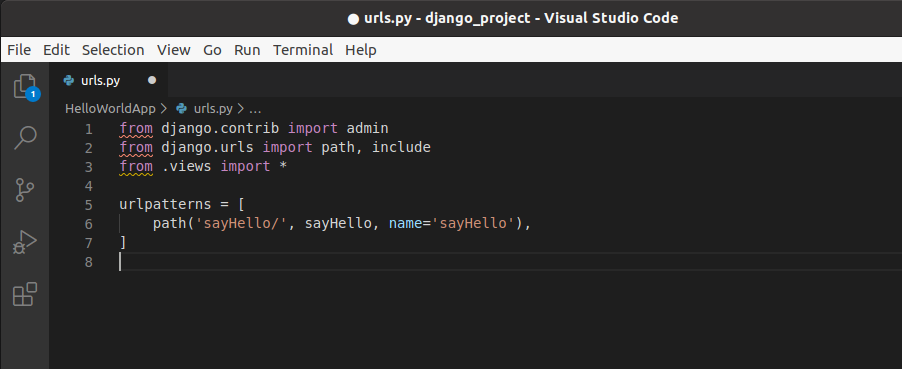
Here’s a sample implementation:
apps/urls.py:
path(‘sayHello/’, sayHello, name = ‘sayHello’)
projects/urls.py:
path(‘ ’, include(HelloWorldApp.urls))
For more than one View, it is suggested to use this new way. And hence from now on, we will keep the endpoints in apps/urls.py and ‘ ‘ (host website linkage) in project/urls.py.
Hence, we can change them now, as shown in the image below.

Now that we know about the path and include functions, let’s move one to make more than one view and link them up to different endpoints.
Django URL mapping for more than one View
Just as we did in our hello world article, we are going to add one more View in the views.py.
Let us create a view Book. Add the code:
def Books(request):
    return HttpResponse("This is a books webpage")

For the newer View, we need to make another endpoint. So in the apps/urls.py we have to just add another path for the endpoint ‘ Books/’
path('Books/', Books,name='Books'),

Now lets run the server and check in the Browser.


URL Mapping – Variable Endpoint
Let us make a View that takes the Book ID as request and then simply returns a line giving us the ID.
In the views.py, let’s make another View having the endpoint like ‘Books/<number>’.
def BookID(request,bookid):
    return HttpResponse(f"The book Id is:{bookid}")
Here we are just taking the book ID along with the request, and then we will return Response specific to that particular Book.

Now we have to add the endpoint in the apps/urls.py.
path('Books/<int:bookid>', BookID, name='BookID'),

Here we have to mention using the syntax shown <int: bookid>
Let’s run and check

Now let’s run the browser and visit 127.0.0.1:8000/Books/1

We can also check for any other random Book ID.

We can see that our web page is working. Hence we can now map any of the Views with the URLs using the knowledge above.
Conclusion
And that brings us to the end. Now, it’s time for our next write up which talks about the Django views and more about what we actually did in views.py here. Stay tuned for more articles on Python Django and Flask in the coming few days!


