🚀 Supercharge your YouTube channel's growth with AI.
Try YTGrowAI FreeTkinter Spinbox and Progressbar Widgets

Hello everyone! In this tutorial series on Tkinter, we’ll learn about the Tkinter Spinbox and Progressbar widgets. We’ll continue by exploring more widgets that we can add to our application.
Let’s look at each of them one by one, using illustrative examples!
Using the Tkinter Spinbox Widget
The Tkinter Spinbox widget is a widget that allows us to choose from a fixed set of values.
Remember the Tkinter Entry widget? Suppose you want to restrict the end user to choose only from a limited set of choices, this is not very useful here!
You’d rather want a fixed set of options to choose from, and that is indeed what the Spinbox widget gives us!
Let’s look at using it now.
This is almost the same as our Entry widget, but you specify the list of values under an optional argument called values, which is a tuple.
spin_box = tk.Spinbox(master, values)
You could also specify from a range of values, using the from_ and to arguments, if your values are between integers / etc.
NOTE: The from_ keyword argument has an underscore at the end, since from is a reserved Python keyword.
spin_box = tk.Spinbox(master, from_, to)
Let’s now make a simple application that has a spinbox widget with some predefined options.
We’ll be using the Grid geometry manager to place our widgets in their suitable positions.
We’ll also give each widget a Label, so that others can identify it using some text.
import tkinter as tk

# Create the master object
master = tk.Tk()

# Create a spinbox widget
spinbox_1 = tk.Spinbox(master, values=("Python", "Java", "C++"))

# And a label for it
label_1 = tk.Label(master, text="Language")

# Create another spinbox widget
spinbox_2 = tk.Spinbox(master, from_=1, to=3)

# And a label for it
label_2 = tk.Label(master, text="Value")

# Use the grid geometry manager to put the widgets in the respective position
label_1.grid(row=0, column=0)
spinbox_1.grid(row=0, column=1)

label_2.grid(row=1, column=0)
spinbox_2.grid(row=1, column=1)

# The application mainloop
tk.mainloop()
Output


If you run this yourself, you can see that you can tweak the values from the specific list that we provided above, for both the spinbox widgets!
For more arguments and tweaks to this widget, you can look at the official Documentation.
Let’s now look at the ProgressBar widget!
Using the Progressbar Widget
The Progressbar widget shows the status of any long running operation.
Suppose that you want to visualize how long the progress of anything takes, you can do so using Progressbar!
This is available in the tkinter.ttk module, so you must import this separately.
import tkinter as tk
# Necessary for the Progressbar widget
import tkinter.ttk as ttk
We’ll take a look at using it using simple options. You can look at the complete list here.
progress_bar = ttk.Progressbar(orient, mode, maximum, value)
Here, orient specifies the orientation of the progress-bar. It can be either “horizontal” or “vertical”
The widget can operate in two modes:
- “Determinate” -> Shows the amount completed relative to total amount of work
- “Indeterminate” -> Simply shows an animated display to show that work is progressing.
The progress-bar will continue until the current value of the bar reaches maximum.
To start incrementing the value of the progressbar, we must use the progress_bar.start(interval), which automatically does this for you, every interval milliseconds.
We’ll keep this to None, and it will be set to a default value of 50 milliseconds
progress_bar.start(interval=None)
We’ll now make sure that the value increments by amount = 10, using the step() method.
progress_bat.step(amount=10)
I’ll post the complete code until now.
import tkinter as tk
import tkinter.ttk as ttk

# Create the master object
master = tk.Tk()

# Create a progressbar widget
progress_bar = ttk.Progressbar(master, orient="horizontal",
                              mode="determinate", maximum=100, value=0)

# And a label for it
label_1 = tk.Label(master, text="Progress Bar")


# Use the grid manager
label_1.grid(row=0, column=0)
progress_bar.grid(row=0, column=1)

# Start auto-incrementing periodically
progress_bar.start()
progress_bar.step(10)

# The application mainloop
tk.mainloop()
Output
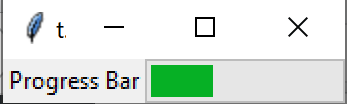
You get a moving progress bar!
This increments value from 0 to 100 every 50 milliseconds, by 10 units.
But are we using the right approach?
But the problem here is that the progress-bar again resets to 0 after it reaches maximum.
To avoid this, we must stop() the Progressbar.
But I realized that this also created more problems than I thought, as then, I am not able to get an updating progress bar.
The biggest problem is that our main application runs in the tk.mainloop() function. So, all this have to be pre-calculated for running in real-time.
So, after a few google searches, I found out that using start() and stop() is NOT the right way to proceed, since it never says something about how the progressbar is redrawn.
Therefore, the only remaining solution (sadly) is to manually update the value of the Progressbar ourselves.
And that indeed seems to be the conclusion that other Tkinter programmers have come up with, seeing the content on StackOverflow posts. Let’s now continue!
Modify the widget values ourselves
To do that, all Tkinter widgets have dictionary attributes, which we can modify! Yes, it’s that simple.
Just update the progressbar value, using:
progress_bar['value'] = 0
master.update()
However, we must also tell the master object that this widget is updated with the new value, using master.update().
Now, we will rewrite our old and incorrect code to account for those changes.
import tkinter as tk
import tkinter.ttk as ttk
import time

# Create the master object
master = tk.Tk()

# Create a progressbar widget
progress_bar = ttk.Progressbar(master, orient="horizontal",
                              mode="determinate", maximum=100, value=0)

# And a label for it
label_1 = tk.Label(master, text="Progress Bar")


# Use the grid manager
label_1.grid(row=0, column=0)
progress_bar.grid(row=0, column=1)

# Necessary, as the master object needs to draw the progressbar widget
# Otherwise, it will not be visible on the screen
master.update()

progress_bar['value'] = 0
master.update()

while progress_bar['value'] < 100:
    progress_bar['value'] += 10
    # Keep updating the master object to redraw the progress bar
    master.update()
    time.sleep(0.5)

# The application mainloop
tk.mainloop()
Now, while we are doing all of the hard-work by updating the values of the widgets ourselves, we have more control.
This code should now be able to display the continuous sequence of the progress-bar, while stopping when value reaches 100.
Here is a simple GIF that illustrates that the program works.

Conclusion
Finally, we’ve come to the end of our tutorial on using the Tkinter Spinbox and the Progressbar widgets. Hopefully, you’ve understood the steps to add more functionality to your GUI Application!
More Tkinter content is coming up, so stay tuned for more!


