🚀 Supercharge your YouTube channel's growth with AI.
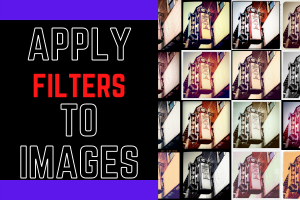
Try YTGrowAI FreePython and OpenCV: Apply Filters to Images
I am pretty sure you have tried out various filters available on the social platforms and your camera as well.
Today in this tutorial, we will be applying few of the filters to images. Exciting right?
Let’s begin!
1. Importing Modules
The first step is to import the required modules which include OpenCV, matplotlib, and numpy module. We will also change the plotting style to seaborn for better visualization.
import cv2
import matplotlib.pyplot as plt
import numpy as np
plt.style.use('seaborn')
2. Loading the initial image
We will be reading and storing the image with the help of the imread function and then convert the colors to RGB format using the cvtColor function and then plot the image using the imshow function.
loaded_img = cv2.imread("image1.jpg")
loaded_img = cv2.cvtColor(loaded_img,cv2.COLOR_BGR2RGB)
plt.figure(figsize=(8,8))
plt.imshow(loaded_img,cmap="gray")
plt.axis("off")
plt.show()
Make sure the image is saved in the same directory as your code file.
2. Creating Filters
Now that our image is loaded and is ready to work upon, we will create our own filters by first creating a kernel for each filter and then converting the kernel values to a 2D Filter.
- What is the Kernel?
Kernels are defined using numpy arrays which are basically 2-dimensional matrices that define the accurate values for sharpening, blurring, and embossing the images correctly.
- Creating 2D Filters
To create the 2D Filters by putting the kernel values and the loaded images into a convolutional network.
2.1 Emboss Filter
The code to get the emboss filter on the image is shown below. First, we created a emboss kernel and the filter for the emboss effect.
Emboss_Kernel = np.array([[0,-1,-1],[1,0,-1],[1,1,0]])
Emboss_Effect_Img = cv2.filter2D(src=loaded_img, kernel=Emboss_Kernel, ddepth=-1)
plt.figure(figsize=(8,8))
plt.imshow(Emboss_Effect_Img,cmap="gray")
plt.axis("off")
plt.show()
2.2 Sharpening Filter
The code to get the sharpen filter on the image is shown below. First, we created a sharpen kernel and the filter for the sharpen effect.
Sharpen_Kernel = np.array([[-1, -1, -1], [-1, 9, -1], [-1, -1, -1]])
Sharpen_Effect_Img = cv2.filter2D(src=loaded_img, kernel=Sharpen_Kernel, ddepth=-1)
plt.figure(figsize=(8,8))
plt.imshow(Sharpen_Effect_Img,cmap="gray")
plt.axis("off")
plt.show()
2.3 Sepia Filter
The code to get the sepia filter on the image is shown below. First, we created a sepia kernel and the filter for the sepia effect.
Sepia_Kernel = np.array([[0.272, 0.534, 0.131],[0.349, 0.686, 0.168],[0.393, 0.769, 0.189]])
Sepia_Effect_Img = cv2.filter2D(src=loaded_img, kernel=Sepia_Kernel, ddepth=-1)
plt.figure(figsize=(8,8))
plt.imshow(Sepia_Effect_Img,cmap="gray")
plt.axis("off")
plt.show()
2.4 Blur Filter
The code to get the blur filter on the image is shown below. First, we created a blur kernel and the filter for the blur effect.
Blur_Effect_Img = cv2.GaussianBlur(loaded_img, (35, 35), 0)
plt.figure(figsize=(8,8))
plt.imshow(Blur_Effect_Img,cmap="gray")
plt.axis("off")
plt.show()
The Final Output
The image below displays all the filters to images one after another.

The same filters were tested for another image, the output is displayed below.

Conclusion
Congratulations! Today we learnt how to build our own filters and apply them to the image.
Try them out yourself! Happy coding!


