Hey, readers! In this article, we will be focusing on Python predict() function in detail. So, let us begin now!!
Understanding the predict() function in Python
In the domain of data science, we need to apply different machine learning models on the data sets in order to train the data. Further which we try to predict the values for the untrained data.
This is when the predict() function comes into the picture.
Python predict() function enables us to predict the labels of the data values on the basis of the trained model.
Syntax:
model.predict(data)
The predict() function accepts only a single argument which is usually the data to be tested.
It returns the labels of the data passed as argument based upon the learned or trained data obtained from the model.
Thus, the predict() function works on top of the trained model and makes use of the learned label to map and predict the labels for the data to be tested.
Implementing Python predict() function
Let us first start by loading the dataset into the environment. The pandas.read_csv() function enables us to load the dataset from the system.
You can find the dataset here.
As the dataset contains categorical variables as well, we have thus created dummies of the categorical features for an ease in modelling using pandas.get_dummies() function.
Further, we have split the dataset into training and testing dataset using the train_test_split() function.
import os
import pandas

#Changing the current working directory
os.chdir("D:/Ediwsor_Project - Bike_Rental_Count")
BIKE = pandas.read_csv("Bike.csv")
bike = BIKE.copy()

categorical_col_updated = ['season','yr','mnth','weathersit','holiday']
bike = pandas.get_dummies(bike, columns = categorical_col_updated)

#Separating the dependent and independent data variables into two data frames.
from sklearn.model_selection import train_test_split

X = bike.drop(['cnt'],axis=1)
Y = bike['cnt']

# Splitting the dataset into 80% training data and 20% testing data.
X_train, X_test, Y_train, Y_test = train_test_split(X, Y, test_size=.20, random_state=0)
Now, let us focus on the implementation of algorithm for prediction in the upcoming section.
Using predict() function with Decision Trees
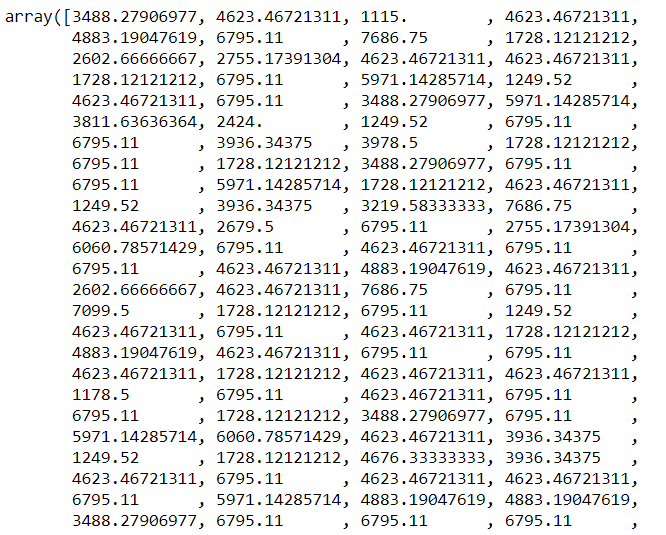
Now, we have applied Decision Tree algorithm on the above split dataset and have used the predict() function to predict the labels of the testing dataset based on the values predicted from the decision tree model.
#Building the Decision Tree Model on our dataset
from sklearn.tree import DecisionTreeRegressor
DT_model = DecisionTreeRegressor(max_depth=5).fit(X_train,Y_train)
DT_predict = DT_model.predict(X_test) #Predictions on Testing data
print(DT_predict)
Output:

Using predict() function with Knn Algorithm
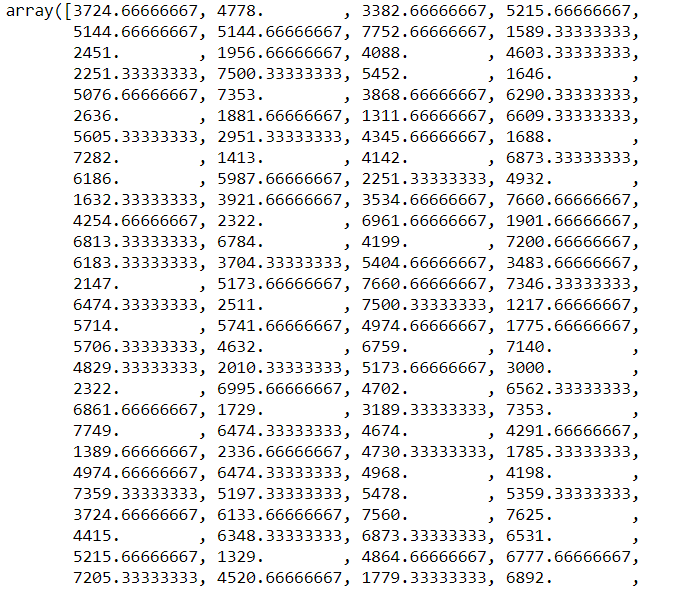
In this example, we have used Knn algorithm to make predictions out of the dataset. We have applied the KNeighborsRegressor() function on the training data.
Further, we have applied the predict() function with respect to the predictions on the testing dataset.
Building the KNN Model on our dataset
from sklearn.neighbors import KNeighborsRegressor
KNN_model = KNeighborsRegressor(n_neighbors=3).fit(X_train,Y_train)
KNN_predict = KNN_model.predict(X_test) #Predictions on Testing data
print(KNN_predict)
Output:

Conclusion
By this, we have come to the end of this topic. Feel free to comment below in case you come across any questions!
For more such posts related to Python, Stay tune and till then, Happy Learning!! 🙂


