🚀 Supercharge your YouTube channel's growth with AI.
Try YTGrowAI FreeFlask Logging – How to Implement Logging in a Flask App?

Hello Friends! In this tutorial, we will learn about Flask logging. So what are you waiting for? Let’s get started !!
Why Logging?
Logging is an essential part of Coding. It helps you understand the flow of your program at a much deeper level. Hence, it makes the whole code running process more transparent.
It also provides developers a separate mechanism to track and store all the events happening with your application in real-time; it can track which IP address is accessing the site, which library is accessed, etc.
Developers can later use this data to analyze the application’s performance and take necessary actions like scaling out.
Another critical reason for logging is to debug errors. With the log of events, we can track the exact step where the error occurred—thus saving a lot of time for the developers.
The 4 Parts of Flask Logging
The whole logging procedure consists of 4 parts: Logger, handler, Formatter, and Filter. Let us look at them individually
1. Logger
It’s entry-level to the logging system. It provides the primary interface that logs events from your application. These events, recorded by the Logger, are called log records.
Each record has a security level. There are 4 levels:
| Log-Level | Severity |
|---|---|
| DEBUG | 10 |
| INFO | 20 |
| WARNING | 30 |
| ERROR | 40 |
| CRITICAL | 50 |
The logger is configured to have a log-level. The logger records only those logs whose severity is higher than it’s log level. The logger then passes them to the handlers
2. Handler
Handlers direct events/records to their destination. Using different handlers, you can route events to different files or even direct some to a file and the rest to a different location using multiple handlers.
3. Formatters
Log Formatters are used to specify the layout of the log record. Hence you can mention the format of the Log being stored.
4. Filters
Using Filters, You can filter the log records based on some parameters other than the log-level.
Using the Default Logging System for Flask
Flask uses the Python logging system itself to trace out events during the application’s run-time.
Python Logging has a default Logger – BasicConfig which we can use to log our messages.
The syntax for the BasicConfig is:
import logging

logging.basicConfig(filename = 'filename.log', level=logging.<log_level>, format = '<message_structure>')
The logs are stored in files with .log extension. If you wish to display logs in the console itself, then remove the filename attribute.
The level attribute specifies the log level of the logger, which can be either DEBUG, INFO, WARNING, ERROR, or CRITICAL. And the format specifies the structure of the record.
It can consist of:
- %(asctime)s— The timestamp as a string.
- %(levelname)s—The logging level as a string.
- %(name)s—The logger name as a string.
- %(threadname)s—The thread name as a string.
- %(message)s—The log message.
To call the logger, we need to call ” app.logger.log_level(“message”) ” wherever required.
Implementing Logging in our Flask Applications
Now let’s apply the Default BasicConfig Logging System in a Flask application. Therefore, consider the code:
from flask import Flask
import logging

app = Flask(__name__)

logging.basicConfig(filename='record.log', level=logging.DEBUG, format=f'%(asctime)s %(levelname)s %(name)s %(threadName)s : %(message)s')

@app.route('/blogs')
def blog():
    app.logger.info('Info level log')
    app.logger.warning('Warning level log')
    return f"Welcome to the Blog"

app.run(host='localhost', debug=True)
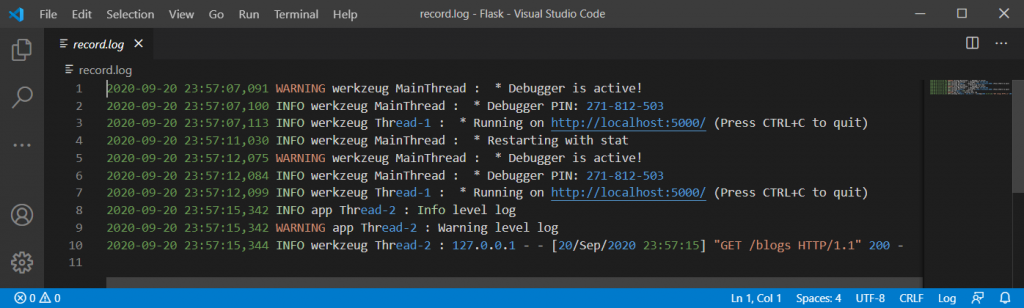
Now run the server and a “record.log” will be created inside your Flask application folder.
Try playing with the webpage, and you will start seeing events getting stored inside the log file.
Conclusion
That’s it! This was all about Flask logging. Do try to implement Logging in your application on your own. See you all in the next article, till then Happy Coding!


