🚀 Supercharge your YouTube channel's growth with AI.
Try YTGrowAI FreeTkinter Create Oval – A Quick Guide

Hola Coders! In this article, we’ll be drawing different shapes using Tkinter. In the previous blog, the topic of Drawing lines using Tkinter was just a good start to this state-of-the-art concept. The reader can view it on this URL. So, in this one moving forward to new let us draw some more shapes.
Also read: Tkinter Tutorial – Drawing a Line Using Tkinter Canvas
Basic setup
For our project files, it is always a good programming practice to set up a new directory. This helps us in sorting out things faster for future purposes.
- Create a folder namely: Tkinter Shapes.
- Create a Python file that holds our script/code. Done!, we are set for coding.
- If any practitioner wants then they can create separate Python scripts for each code
Skip the basics? Jump to creating ovals in Tkinter.
Creating a Tkinter Canvas
A Canvas in Tkinter is the basic window that helps us perform drawing and relative stuff. It is a white screen that acts as a whiteboard where we have colorful chalk and it is ready to show our sketches. Below is the code for Canvas setup:
Code:
from tkinter import Tk
from tkinter import Canvas

window = Tk()
window.geometry("400x400")
window.configure(background = "grey")
window.title("Canvas - Draw Shapes")
window.resizable(False, False)

# setting up the canvas
canvas = Canvas(width = 350, height = 350, bg = "white")
canvas.pack(pady = 20)

window.mainloop()
Output:

So, we have our Tlkinter window with a Canvas at its middle.
- It is of 350×350 resolution.
- The background is set to white.
Functions to draw shapes
There are built-in functions to draw shapes on the Canvas. These are derived from the Canvas class itself. The list is as follows:
- create_line() – to draw a line.
- create_arc() – sketch arcs on the screen.
- create_oval() – To draw ovals, circles, ellipses.
- create_polygon() – Trace hexagons, pentagons etc.
Let’s look at the 2 functions that matter most to us here – the create_arc() and create_oval() method. Let’s get started!
Create arcs in Tkinter
Code:
from tkinter import Tk
from tkinter import Canvas

window = Tk()
window.geometry("400x400")
window.configure(background = "grey")
window.title("Canvas - Draw Shapes")
window.resizable(False, False)

# setting up the canvas
canvas = Canvas(width = 350, height = 350, bg = "white")
canvas.pack(pady = 20)

# create a text that renders the name of our shape
canvas.create_text(175, 30, text = "Arc", font = ("Arial", 30))

#create an arc
canvas.create_arc(0, 340, 200, 100, width = 5)

window.mainloop()
Output:
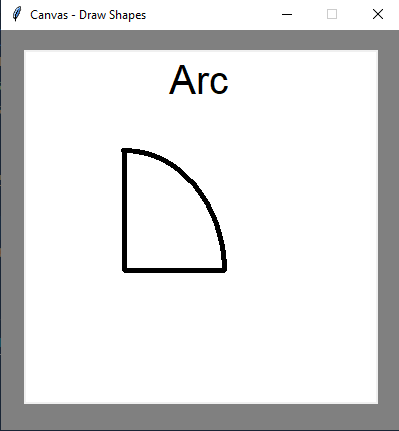
Explanation:
- The first seven lines of code are the basic setup of window and canvas.
- From the eight-line, we draw an arc. Call the create_arc() function. To place it in the axes plane give the coordinates (x1, y1, x2, y2). Remember to give them as per the sequence. The last parameter is width. This is for the thickness of the shape.
- We can also add color to the arc using the fill parameter. Just call it inside create_arc() and then give the color name in String format: “color_name”.
- To add more detail we render a text using the create_text() function. We place it at the top head of the Canvas and give the font like Arial and size as 30.
Code to draw colorful arcs:
from tkinter import Tk
from tkinter import Canvas

window = Tk()
window.geometry("400x400")
window.configure(background = "grey")
window.title("Canvas - Draw Shapes")
window.resizable(False, False)

# setting up the canvas
canvas = Canvas(width = 350, height = 350, bg = "white")
canvas.pack(pady = 20)

canvas.create_text(175, 30, text = "Arc", font = ("Arial", 30))
canvas.create_arc(0, 340, 200, 100, width = 5, fill = "orange")

window.mainloop()
Output:

So, the code is the same as that of the previous. We just add the fill parameter inside the create_arc() function and we got a beautiful result.
Create circles and oval in Tkinter
Ready to create an oval using Tkinter? Let’s jump right into it.
Code for oval:
from tkinter import Tk
from tkinter import Canvas

window = Tk()
window.geometry("400x400")
window.configure(background = "grey")
window.title("Canvas - Draw Shapes")
window.resizable(False, False)

# setting up the canvas
canvas = Canvas(width = 350, height = 350, bg = "white")
canvas.pack(pady = 20)

canvas.create_text(175, 20, text = "Circle", font = ("Arial", 30))
canvas.create_oval(175, 100, 100, 175, width = 3)

window.mainloop()
Output:

Explanation:
- The first seven lines are the basic setup of Tkinter and canvas.
- In the Canvas object, we call the create_oval() function. This is responsible for tracing ovals and circles.
- Give the coordinates and then we have our result.
The create_oval() method can also help you create circles. Simply ensure that x1 and y2 are the same and x2 and y1 are the same.
Code for circle:
from tkinter import Tk
from tkinter import Canvas

window = Tk()
window.geometry("400x400")
window.configure(background = "grey")
window.title("Canvas - Draw Shapes")
window.resizable(False, False)

# setting up the canvas
canvas = Canvas(width = 350, height = 350, bg = "white")
canvas.pack(pady = 20)

canvas.create_text(175, 20, text = "Circle", font = ("Arial", 30))
canvas.create_oval(175, 100, 100, 175, width = 3)

window.mainloop()
Output:

Conclusion
So, in this way, we can draw different shapes using Tkinter’s Canvas and built-in shape functions. This library is very beginner-friendly to start with for GUI programming and development. I recommend the reader play around with the code and try to customize these shapes. I hope this will be a fun article to read.


